Vizualization of 1CPN
Vizualizing the 1CPN model is more chalenging than many other molecular models because each coarse-grained sit in 1CPN in represented by an anisotropic potential. Most vizualization tools (like VMD) are designed for isotropic sites, and generally represent each site by a sphere. Consequently, due to the anisotropic potentials in 1CPN, vizualizing the model requires some additional steps.
The 1CPN model includes offers several workflows for vizualizing 1CPN trajectories. The ideal workflow depends on the type of simulation you have run, and the phenomena of interest that you want the simulation to highlight. Below we describe two approaches for visualizing 1CPN with VMD (Visual Molecular Dynamics) and one approach for high quality vizualization using Blender.
Users who do not have VMD should install it following the instructions at the VMD website (note that VMD 1.9.2 was used in this tutorial).
Throughout this tutorial it is assumed that VMD is accessed though vmd at the command line.
Option 1: Basic VMD
Speed = Fast, Vizualization Quality=Poor
The 1CPN can be quickly vizualized by loading traj.dump directly into LAMMPS.
vmd in.psf -lammpstrj traj.dump
Now that the trajectory is loaded into LAMMPS, a suitable visual representation can be loaded by Opening the Tk console by clicking on Extensions->Tk Console, in the VMD Main window, and executing the following command.
source <path-to-D_1CPN>/1cpn-model//utils/vmd/1cpn.vmd
Note that in this case the bash variable ${D_1CPN} cannot be used and <path-to-D_1CPN> must be hardcoded manually. If you will be vizualizing the 1CPN Model frequently, it is recommended that you add this source command a file located at ~/.vmdrc so that it will be executed automatically when VMD opens.
Though this visualization can be useful for some purposes (like examining bond lengths and angles), it is generally unsuitable for visualizing large simulations.
FIXME make 1cpn.vmd look acceptable for vizualizing the raw traj.dump FIXME SAMPLE VIZUALIZATION
Option 2. Enhanced VMD (recommended)
Speed = Medium-Fast, Vizualization Quality=High
Another approach for vizualizing the 1CPN model is to convert traj.dump into a new file where anisotropic sites are more easily vizualized, and then visualizing this new trajectory file direcly in VMD.
In 1CPN, this conversion tool is an executable dump-to-xyz that is located in ${D_1CPN}/bin/ and is compiled by
cd ${D_1CPN}/1cpn-model/src/viz
make
FIXME, this breaks if LAMMPS_SRC isn’t canonical. FIXME remove quat_vec_rot from trajectory_iterator.h FIXME have a single Makefile in ${D_1CPN}
The executable dump-to-xyz takes two arguements:
- The filename of an existing trajectory (traj.dump in this example), and
- The filename prefix of the new trajectory files to be generated (traj_1cpn here).
${D_1CPN}/1cpn-model/bin/dump-to-xyz traj.dump traj_1cpn
After executing this command, two new files (traj_1cpn.psf and traj_1cpn.xyz) are generated. These files contain a modified topology file (.psf) and a modified trajectory file (.xyz). Specifically, these new files contain create additioal (fictitious) sites that show the orientation of each 1CPN site. For Nucleosome sites, these fictitious sites are created to highlight their anisotropic shape (from the Zewdie potential LINKME). For DNA sites, fictitious sites are created to highlight the twist of the DNA molecule.
These new files can be vizualized with VMD
vmd traj_1cpn.psf traj_1cpn.xyz
# or
vmd traj_1cpn.*
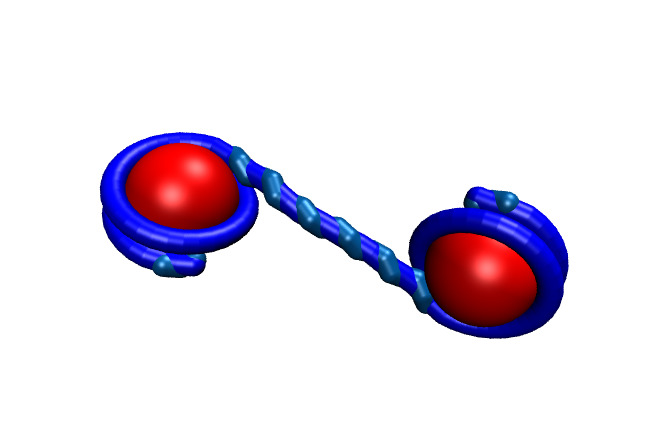
An example of a nucleosome rendered using Option 2 is shown here:
Option 3. Blender
Speed=Low, Vizualization Quality=Very High
The final option for vizualizing the 1CPN model is to use the open source 3D conputer graphics toolset Blender. Blender is a very powerful flexible tool for vizualization and premits the customization of virtually any feature of a digital vizualization. Blender is not strictly designed for molecular vizualizaiton, and therefore
This tutorial assumes a basic familiarity with Blender
FIXME Is blender okay for many frames
FIXME Clean up front of Blender script so that its easier for a new person
- Setting up file paths and rendering options.
The main script of interest is ${D_1CPN}/1cpn-model/utils/blender/import_dump.py and cha
PATH_ZEWDIE = PATH_TRAJ =
- ::
- cd /tmp ln -s ${D_1CPN}/example/in.dump frame.dump
- Open blender, and change the bottom pannel to text editor
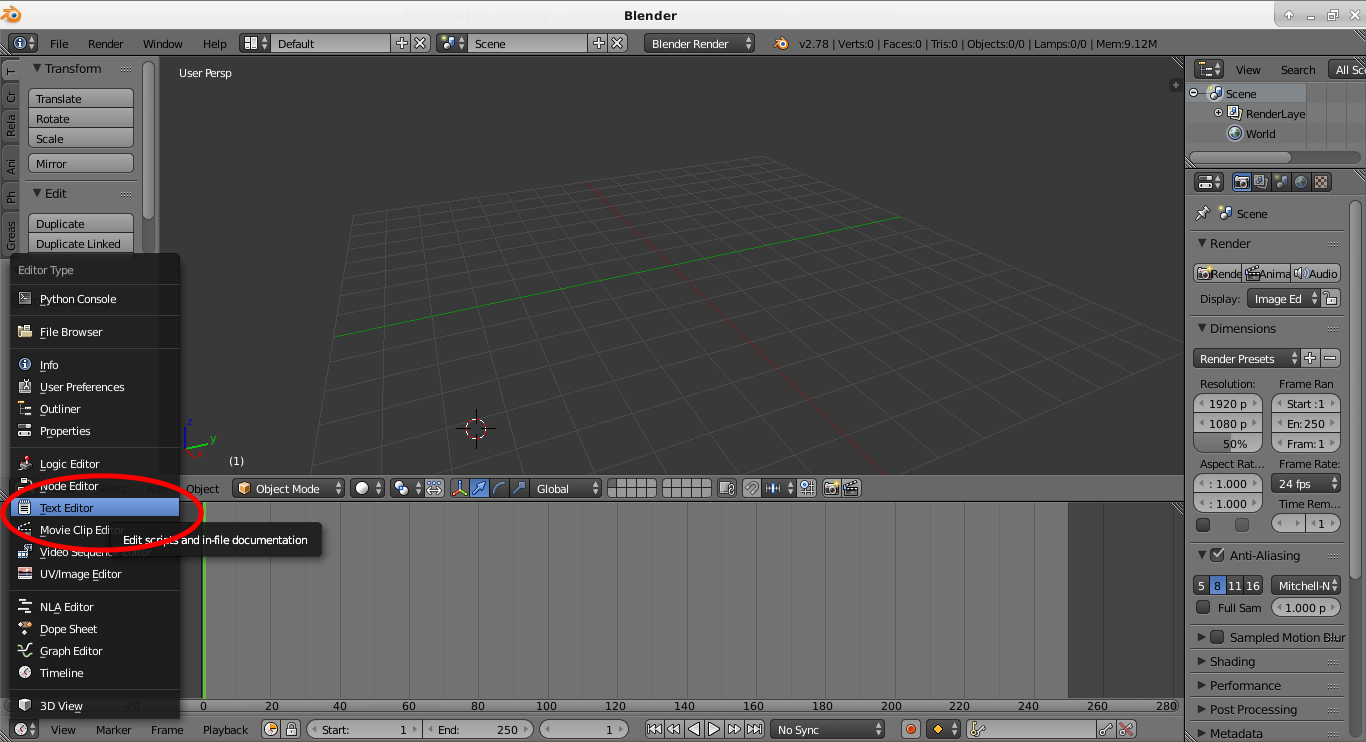
- In the Text Editor window, click the Open button, and navigate to ${D_1CPN}/1cpn-model/utils/blender/import_dump.py. Once the file is loaded, click the Run Script button. This could take a minute or two to run.

- Now the 1CPN Model should be loaded into Blender.

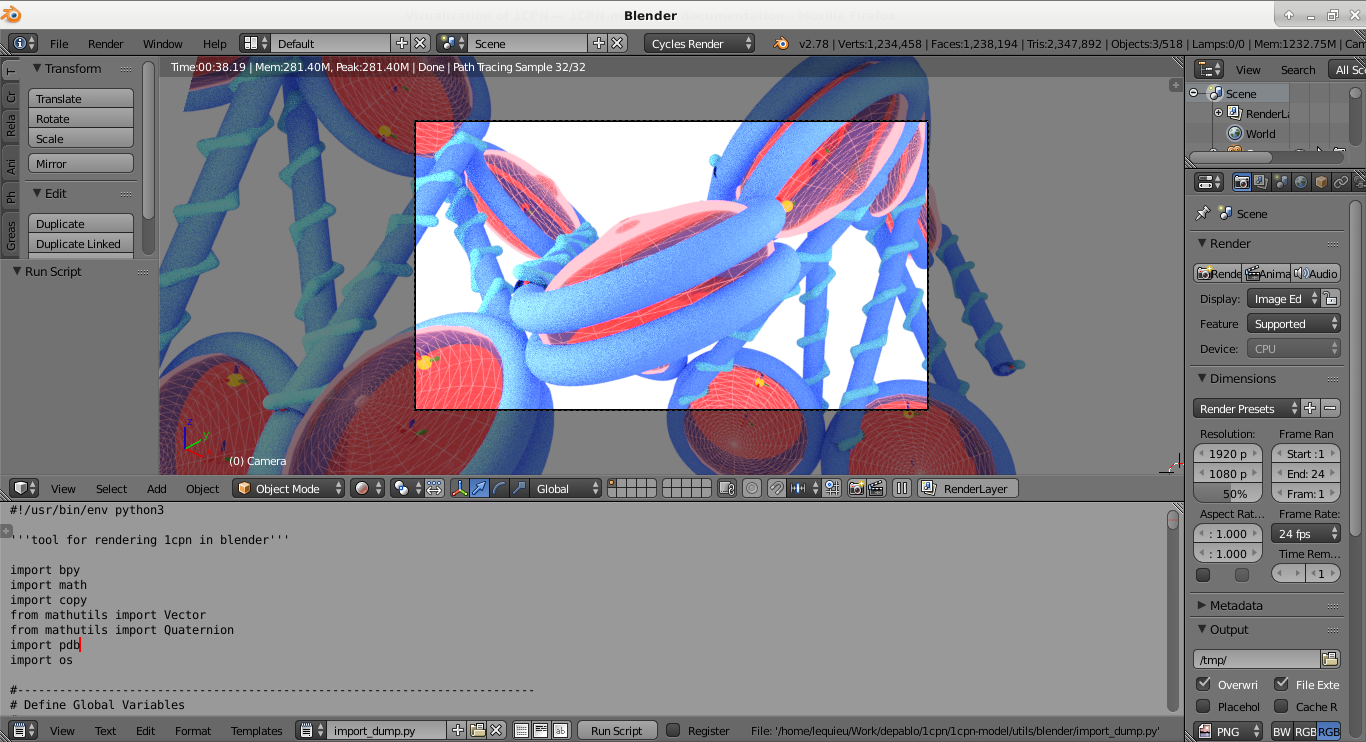
- To see the artistic rendering, move your mouse into the 3D View panel and press Shift-Z to turn on Materials Rendering (or select Viewport Shading -> Rendered using your mouse.) Switching to camera view results in the following image.
Now that 1CPN is loaded into Blender, anything is possible. Change try new materials, add camera animations, go nuts!
Note
If you’re going to be adventerous and start making significant modifications to ${D_1CPN}/1cpn-model/utils/blender/import_dump.py, I would suggest making file edits in your own text editor and not Blender’s build-in one. If your choose to use your own text edior, just make sure to reload the updated import_dump.py in Blender’s text editor before clicking the Run Script button. Blender should notice when import_dump.py is changed and notify you, but its important to remember that Blender doesn’t refresh its internal text editor by default.